 Inverters & Batteries ship FREE
 Ask about rewards for referring friends and family
 U.S. Based Support
 Want to Add a battery?
solar inverters
How to Wire an EG4 Battery for Off-Grid Backup (2026)
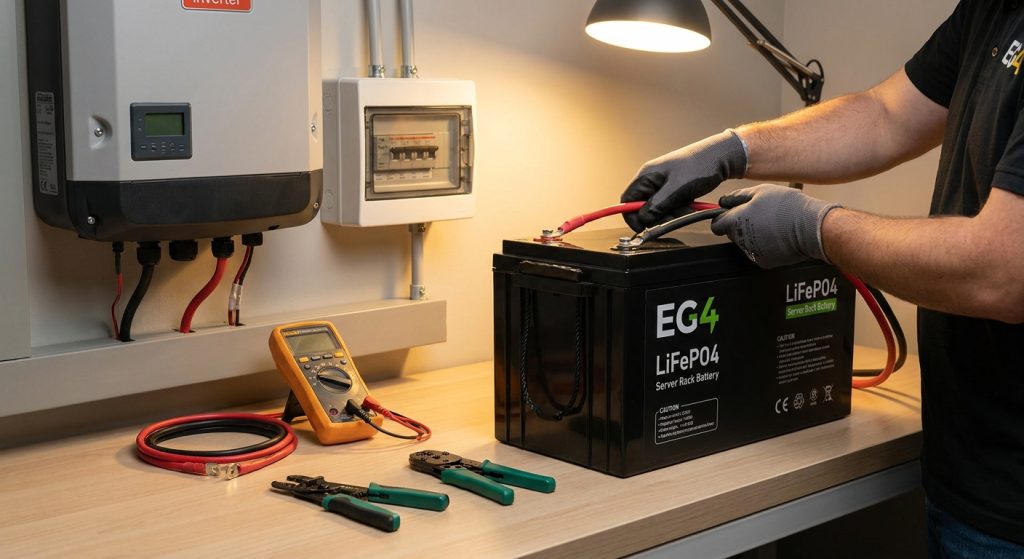
Wiring an EG4 battery wrong doesn't just trip a breaker — it can cook a busbar, void the warranty, or put 48 volts DC across a wrench you're holding. This guide walks through the actual wiring sequence for EG4 wall-mount and stackable lithium batteries in an off-grid or backup setup, from lug prep to first charge cycle. Wiring an EG4 battery for off-grid backup means confirming battery communication protocol (RS485 or CAN) matches your inverter, torquing DC terminals to spec (typically 8-10 ft-lbs on EG4 LL units), sizing cable for continuous discharge current, and closing the breaker only after every module reports the same voltage. Skip the pre-charge check and you risk arc damage at first connection. In 2026, most off-grid installers pair EG4 batteries with a Sol-Ark or similar hybrid inverter — get that pairing wrong and the batteries simply won't communicate, no matter how clean the wiring is.
Why this matters
A battery bank wired correctly the first time runs for a decade with zero drama. Wired wrong, you get phantom faults, batteries that won't balance, or a breaker that nuisance-trips every time the inverter pulls a hard load. Off-grid systems are less forgiving than grid-tied setups because there's no utility backstop — if the battery bank drops out at 2 a.m., the house goes dark. Getting the wiring sequence right up front saves a service call in January 2026 that costs more than doing it correctly took in the first place.
What you'll need
- EG4 battery module(s), rated for your target voltage (most stack at 48V nominal)
- DC-rated battery cable, sized to your inverter's continuous discharge current (4 AWG minimum for most single-battery 100A setups, 2/0 or larger for multi-battery banks)
- A DC-rated breaker or fuse sized to the battery's max continuous output (commonly 125A-150A per string)
- Torque wrench capable of reading in the 8-15 ft-lb range
- RS485 or CAN communication cable (check your inverter's supported protocol before buying — this is the single most common EG4 install mistake)
- Insulated lugs, heat shrink, and a crimping tool rated for the cable gauge you're using
- A multimeter
- Compatible hybrid inverter — Sol-Ark units are a common pairing for EG4 battery banks, and Sun Supply PV stocks Sol-Ark alongside other backup-ready inverter brands
Batteries and inverters ship free through Sun Supply PV, so budget the freight line at zero and put that money toward cable and lugs instead.
The steps
1. Confirm voltage and protocol before you touch a wire
Check the nameplate voltage on every EG4 module and confirm it matches your inverter's DC input window. Most EG4 wall-mount units run 48V nominal with an operating range roughly 42V to 58.4V — outside that band, the inverter won't accept the connection. Also confirm the communication protocol: EG4 batteries typically speak RS485 or CAN, and the inverter's battery settings menu has to be set to match exactly or the units will charge/discharge but never report state of charge correctly. Common mistake: wiring the power cables first and discovering the comms mismatch after the fact.
2. Mount and space the batteries
Mount each battery per its rated clearance — most wall units need a few inches of airflow space top and bottom for the internal BMS fan to work. Stackable floor units need a flat, level surface; an out-of-level base stresses the case seams over time. Leave the front face fully clear for the status display and any reset buttons. Expected outcome: each unit powers on independently and shows a stable state-of-charge reading on its own display before any bank wiring begins.
3. Wire batteries in parallel using equal-length cable
When running more than one EG4 module, connect the positive terminals to a common busbar and the negatives to a common busbar, using cable of identical length and gauge for every unit. Unequal cable lengths create unequal resistance, which means one battery does more work than the others and ages faster. For a two-battery bank at 100A per unit, that's 4 AWG minimum per leg; for larger banks, size up and confirm against your inverter's spec sheet. Common mistake: running a "close enough" cable length to save a foot of copper — the imbalance shows up as one battery cycling harder within months.
4. Install the breaker or fuse between battery and inverter
Size the DC breaker to the battery bank's maximum continuous discharge rating, not the inverter's peak rating — the two numbers aren't always the same. A single EG4 LL battery module is commonly rated around 100A continuous, so a 125A breaker gives headroom without being oversized enough to let a fault run unprotected. Mount the breaker in an accessible spot; it's your emergency disconnect, not just a code requirement.
5. Torque every terminal to spec
Under-torqued lugs arc and heat up under load; over-torqued lugs crack the terminal post. EG4 battery terminals typically call for 8-10 ft-lbs — check the manual for your specific model since torque specs vary slightly between the LL and other stackable lines. Use a torque wrench, not a guess-and-feel impact driver. Common mistake: hand-tightening until it feels snug, which is the single most common cause of warm terminals discovered during a 2026 service call.
6. Connect and configure the communication cable
Run the RS485 or CAN cable from the battery's comm port to the inverter's battery comm input, following the pinout in the battery's manual exactly — reversed pins are a common source of battery-not-detected errors. Set the inverter's battery brand/protocol setting to match EG4's published values before powering anything on. Expected outcome: the inverter's display shows live state-of-charge and voltage data pulled directly from the battery's BMS, not an estimated value.
7. Pre-charge check and first energize
Before closing the main breaker, verify with a multimeter that busbar voltage matches each individual battery's displayed voltage within a volt or so. A larger mismatch means a wiring error or a battery that didn't fully activate — don't close the breaker until it's resolved. Close the breaker, watch the inverter's battery screen for a clean voltage read with no fault codes, and let the system run a full charge/discharge cycle before calling the install done.
Troubleshooting
- Inverter shows battery not detected: Check the comm cable pinout and confirm the inverter's protocol setting matches RS485 or CAN, whichever the EG4 unit uses.
- One battery reads a different voltage than the rest: Cable length or gauge mismatch is the usual cause — remeasure every leg from busbar to terminal.
- Breaker trips on inverter startup: The breaker is undersized for inrush current; recheck sizing against the inverter's surge rating, not just continuous draw.
- Terminal feels warm after a few charge cycles: Under-torqued lug. Shut down, re-torque to spec, and inspect for pitting before re-energizing.
- State of charge readings drift between batteries over weeks: Parallel wiring imbalance from unequal cable runs — batteries at the end of a daisy chain age differently than those closer to the busbar.
- System runs fine on generator but drops out on solar-only days: Usually a charge controller setting mismatch, not a wiring fault — check absorption and float voltage targets against the battery's published charge profile.
Tools and resources
- Torque wrench (8-15 ft-lb range) and a crimping tool matched to your cable gauge
- DC-rated cable and lugs sized for your bank's continuous amperage
- A compatible hybrid inverter — if EG4 isn't the direction you land on, FranklinWH's whole-home backup setup and Tesla Powerwall for homes with EV chargers are both stocked with free shipping on the battery and inverter hardware
- Manufacturer install manual for exact torque and pinout specs — always defer to the printed manual over general guidance when the two disagree
What to do next
Once the battery bank is wired and cycling clean, the next decision is whether your inverter and charge controller settings are actually tuned for your usage pattern — a battery wired perfectly but charged on default settings still underperforms. Review your inverter's charge profile against the battery manufacturer's published curve before the first winter cycle in 2026.
FAQ
What gauge wire do I need to wire an EG4 battery?
Most single-battery setups at 100A continuous need 4 AWG minimum; multi-battery banks typically need 2/0 AWG or larger. Always size to your inverter's continuous discharge rating, not just the battery's nameplate.
Does an EG4 battery need a specific inverter to work?
EG4 batteries need an inverter that supports their communication protocol (RS485 or CAN) — a mismatched protocol means the battery charges and discharges but won't report state of charge accurately. Sol-Ark is a common pairing in 2026 off-grid installs.
Is it better to wire batteries in series or parallel for off-grid backup?
Parallel wiring at 48V nominal is standard for EG4 stackable batteries because it keeps voltage consistent while adding capacity. Series wiring changes system voltage and isn't how most EG4 modules are designed to expand.
How much torque does an EG4 battery terminal need?
Most EG4 LL-series terminals call for 8-10 ft-lbs — confirm the exact spec in your unit's manual since it can vary slightly by model.
What breaker size do I need for an EG4 battery bank?
Size the breaker to the bank's maximum continuous discharge, commonly 125A-150A for a single-string setup — never size it to the inverter's peak surge rating alone.
Can I mix EG4 batteries with a different battery brand in the same bank?
Mixing battery brands or chemistries in one bank isn't standard practice and typically isn't supported by any manufacturer's BMS — keep banks single-brand and match capacity across all units.
Why won't my inverter detect the EG4 battery after wiring?
The most common cause is a communication protocol mismatch or a reversed comm cable pinout — check both before assuming a wiring fault on the power side.
How long does an EG4 battery bank take to install?
A single-battery setup with pre-run cable typically takes an afternoon; multi-battery banks with custom busbar work often run a full day, especially with comm cable troubleshooting factored in.
One last thing
The detail that trips up more installs than any wiring mistake is charge profile mismatch — a battery wired flawlessly still ages fast if the inverter's absorption and float voltages don't match what the battery's BMS expects. Pull the charge curve from the manual before the first full cycle, not after the battery's already lost capacity.
Related guides
