 Inverters & Batteries ship FREE
 Ask about rewards for referring friends and family
 U.S. Based Support
 Want to Add a battery?
solar inverters
How to Wire a Solar Combiner Box (2026 Step-by-Step)
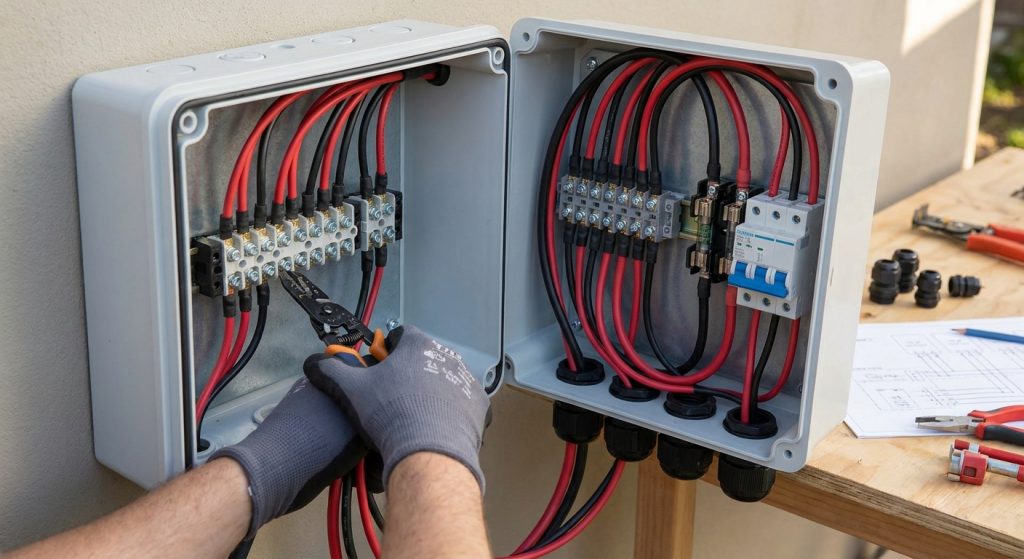
Combining multiple PV strings into a single output feeding your inverter is one of the most common wiring tasks on a residential or small commercial array, and it's also where inspectors find the most violations. A properly wired combiner box protects each string with its own fuse, keeps polarity correct, and gives you a single labeled disconnect point instead of a rat's nest of MC4 connectors. Get the wire gauge, fuse rating, and grounding wrong and you've got a fire hazard hiding behind a metal door.
This guide walks through wiring a solar combiner box for multiple strings step by step, from string count planning to final continuity testing, with the torque specs and NEC references installers actually need in 2026.
What You'll Need
- Combiner box rated for your string count and voltage (residential jobs typically run 4-12 fuse positions)
- String fuses or breakers sized to 156% of each string's short-circuit current (Isc) per NEC 690.9
- THWN-2 or USE-2 conductors sized per your voltage drop calculation, typically 10 AWG or 8 AWG for residential strings
- Torque screwdriver or driver bit set (most lugs call for 35-45 in-lbs, check the box's spec sheet)
- Digital multimeter with DC voltage and continuity settings
- Wire strippers, ferrules if your lugs require them, and heat-shrink or grommets for conduit entry points
- Grounding electrode conductor and a bonding lug rated for the box
- Labels for string identification and arc-flash/DC warning per NEC 690.31 and 690.56
If you're wiring for a larger residential array with tile or metal roofing, confirm your solar panel mounting systems for tile roofs or metal roof attachment plan is finalized before you run conduit to the combiner location. Changing string layout after conduit is set means re-running wire.
The Steps
1. Map Your String Configuration First
Before anything touches the combiner box, write down how many strings you're combining, each string's Voc, Isc, and the total output at STC. This determines box size, fuse rating, and output conductor gauge in one pass.
A typical 8kW residential array split into three strings of 8-10 panels each will show roughly 9-10A Isc per string. Multiply by 1.25 for the NEC continuous-load factor, then by 1.25 again for the combiner sizing margin, and you land near a 15A fuse per string position. Skipping this step is the single biggest reason combiner boxes get re-wired after inspection.
Common mistake: using the same fuse rating across mismatched strings (different panel counts or orientations) instead of calculating each string independently.
2. Mount the Combiner Box and Run Conduit
Mount the box on a rigid, accessible surface, typically within reach of the DC disconnect and not buried behind racking. Conduit entries should come from the bottom or side to keep water out, never straight into the top of the enclosure.
Use liquid-tight conduit fittings for any outdoor run. Leave 8-10 inches of slack conductor inside the box for terminations, not more, since excess wire crowds the fuse holders.
Common mistake: mounting the box at a height that forces the inspector to use a ladder to read labels; keep it within normal eye level per most AHJ preferences.
3. Land the Positive and Negative Leads on Each Fuse Position
Strip each conductor to the length specified on the terminal block, typically 3/8 to 1/2 inch, and insert into the corresponding fuse holder. Positive leads go to the positive busbar side, negative to the negative busbar, and every string gets its own fuse position, no doubling up.
Torque every lug to spec, usually 35 in-lbs for smaller terminal blocks and up to 45 in-lbs on larger combiner boxes. Under-torqued lugs are the number one cause of hot-spot failures found during thermal imaging audits in the field.
Common mistake: reversing polarity on one string out of three. This won't blow a fuse immediately but will show up as a voltage mismatch during commissioning, and in the worst case damages the inverter's input stage.
4. Bond the Grounding Conductor
Run the equipment grounding conductor to the dedicated ground lug inside the box, bonded to the enclosure per NEC 250.
Don't rely on conduit alone for grounding continuity unless your AHJ explicitly allows it; most residential jobs in 2026 still require a dedicated copper EGC run alongside the current-carrying conductors.
Common mistake: landing the ground wire under a shared lug with another conductor. Every ground termination gets its own point of contact.
5. Wire the Combined Output to the Disconnect or Inverter
Size the output conductor for the sum of all string currents after the 1.25 continuous-duty multiplier, not the sum of individual string wire gauges. A three-string 30A combined output typically steps up to 8 AWG or larger depending on run length and voltage drop.
Route the combined positive and negative output to your DC disconnect, then to the inverter's DC input terminals. If you're feeding a hybrid inverter paired with battery backup, cross-check your combiner output against the specs on the solar inverters for whole-home backup during grid outages page before final hookup.
Common mistake: undersizing the output conductor because it only carries the sum of currents that seemed small per-string.
6. Label Every Circuit
NEC 690.31 and 690.56 require labeling on every combiner box: string identification, maximum voltage, maximum current, and a DC disconnect warning label on the enclosure door. Use permanent, weather-rated labels, not tape.
Inspectors in 2026 are increasingly strict on labeling since it's the fastest thing to check on a rooftop walkthrough. A box with unlabeled fuse positions is an automatic red tag in most jurisdictions.
Common mistake: labeling strings by installer shorthand instead of matching the labels on the as-built drawing submitted for permit.
7. Test Before Closing the Enclosure
With all strings landed and before applying full sun exposure, check open-circuit voltage on each string individually with a multimeter, confirm polarity, and verify no shorts between positive and negative busbars.
Once confirmed, close the enclosure, torque the door hardware, and confirm the gasket seats fully. A gap in the gasket is how water finds its way to a live busbar during the first storm.
Common mistake: closing the box before testing, then having to reopen it when the inverter throws a ground fault code at commissioning.
Troubleshooting
- Inverter shows a ground fault after startup: check for a pinched conductor at a conduit entry or a reversed ground bond; this is the most common post-install fault.
- One string reads zero voltage: confirm the fuse for that position hasn't blown; check Isc calculations if it blows repeatedly under normal sun.
- Combiner box runs hot to the touch: almost always an under-torqued lug; retorque to spec and check with a thermal camera if available.
- Voltage mismatch between strings: usually a wiring error, mismatched panel counts, or partial shading on one string; verify against your original string map.
- Water intrusion at conduit entry: re-seal with liquid-tight fittings; don't rely on silicone alone in high-wind or coastal regions.
- Inspector flags missing labels: reprint labels matching your as-built plan set exactly, including voltage and current values per string.
Tools and Resources
- Torque screwdriver calibrated to the box manufacturer's spec
- Digital multimeter with DC voltage and continuity modes
- NEC 690 reference for grounding and labeling requirements
- Solar combiner boxes for multi-string residential arrays if you're still sizing the enclosure itself
- Best solar combiner boxes for commercial rooftop arrays for larger string counts on flat commercial roofs
Sun Supply PV stocks combiner boxes across residential and commercial string counts, and every fuse holder and lug spec sheet ships with the unit so installers aren't guessing torque values in the field.
What to Do Next
If your array pairs with an MPPT charge controller instead of a grid-tie inverter, sizing changes. Check how to size an MPPT charge controller for a solar array before finalizing your combiner-to-controller wiring, since controller input current limits affect how many strings you can safely combine on one output.
Jobs requiring a stamped structural plan set for permit should also confirm engineering sign-off early. How to get a structural engineer stamp for a solar permit covers what most AHJs expect on the paperwork side in 2026.
FAQ
What size fuse do I need for a solar combiner box? Size each string fuse to 156% of that string's Isc per NEC 690.9. For a string with 10A Isc, that's a 15.6A calculated value, rounded up to the nearest standard fuse rating, usually 16A or 20A depending on the manufacturer's holder.
Can I combine strings with different panel counts in one combiner box? Yes, but each string needs its own independently calculated fuse rating and wire gauge; never assume uniform sizing across mismatched strings.
Is a ground fault after wiring a combiner box always a wiring mistake? Not always, but it's the most common cause. Check conduit pinch points and ground bonding connections before assuming an inverter fault.
How many strings can one combiner box handle? Residential combiner boxes typically run 4-12 fuse positions; commercial rooftop arrays often need multiple boxes or a larger enclosure depending on total string count.
Does a combiner box need a separate DC disconnect? Most jurisdictions require a disconnect between the combiner output and the inverter, even if the combiner box has its own door-mounted disconnect switch.
What wire gauge is standard for combiner box output? It depends on combined current and run length, but 8 AWG to 6 AWG is common for combined outputs above 30A on typical residential runs.
Do combiner boxes need to be UL listed? Yes, for AHJ approval in nearly every U.S. jurisdiction in 2026; confirm UL 1741 or equivalent listing before purchase.
Why is my combiner box getting hot? Under-torqued lugs are the leading cause; retorque connections to the manufacturer's spec and inspect with a thermal camera if the issue persists.
One Last Thing
Most combiner box failures found during service calls in 2026 trace back to a torque spec that was eyeballed instead of measured, not a defective fuse holder or busbar. A torque screwdriver used correctly on every lug prevents more callbacks than any premium combiner box on the market.
Related Guides
