 Inverters & Batteries ship FREE
 Ask about rewards for referring friends and family
 U.S. Based Support
 Want to Add a battery?
solar inverters
How to Install Solar Mounting on Metal Roof (2026 Guide)
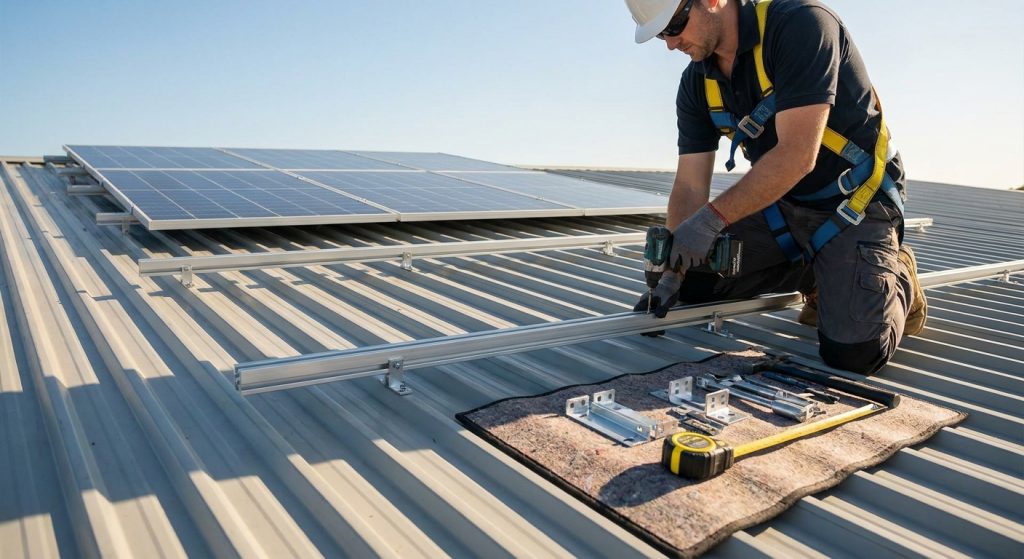
Metal roofs are some of the best surfaces for solar, but the mounting hardware you use depends entirely on the roof profile — standing seam, corrugated, or exposed-fastener panels each call for different clamps and flashing. Get the attachment method wrong and you're looking at leaks, voided roof warranties, or racking that pulls loose in a 60 mph gust. Matching the clamp type to the seam profile is the single decision that determines whether the rest of the install goes smoothly: standing seam gets non-penetrating clamps, exposed-fastener profiles need sealed lag screws into structural framing. IronRidge, Unirac, and S-5! all make metal-roof-specific hardware, and the right choice depends on your wind zone, seam height, and whether you're working with 26-gauge or 24-gauge panels — skip generic universal brackets on standing seam in favor of profile-matched clamps.
Why this matters
A metal roof can outlast three or four asphalt shingle replacements, which is exactly why installers push metal roof work before a solar install — you won't be pulling panels off again in 15 years. But metal roofs come in dozens of seam profiles, and the mounting hardware isn't universal the way it can be with composition shingle flashing kits. Pick the wrong clamp and you're either drilling holes you didn't need to drill, or clamping onto a seam that wasn't designed to carry rail load.
The payoff for doing it right is real: standing seam metal roofs let you skip roof penetrations almost entirely, which means no flashing, no sealant maintenance, and no long-term leak risk tied to the racking itself. Reviewing metal roof mounting systems before you order hardware saves a second trip to source the right clamp size for your seam height.
What you'll need
- Roof profile confirmed — standing seam (with seam height measured), corrugated, or exposed-fastener
- Mounting clamps matched to profile: S-5! or equivalent non-penetrating clamps for standing seam, sealed L-feet for exposed-fastener
- Racking rails rated for your wind zone (IronRidge XR100 or XR1000-class rail, or Unirac SM equivalents)
- Torque wrench calibrated to the clamp manufacturer's spec, typically in the 90–120 in-lb range for seam clamps
- Butyl or urethane sealant for any penetrating fasteners
- Ladder, roof anchors, harness, and fall protection rated for the roof pitch
- Chalk line, tape measure, and a layout plan with rafter or purlin spacing marked
- Grounding lugs and bonding jumpers for the racking array
- A wind load calculation for your rail spacing and attachment count before you drill or clamp anything
If the system includes microinverters, a string inverter, or a battery, order those separately — batteries and inverters ship free, so there's no reason to bundle shipping costs into the racking order.
The steps
1. Identify your roof profile and confirm hardware compatibility
Walk the roof and measure the seam height and spacing before ordering anything. Standing seam profiles run anywhere from 1 inch to 2 inches tall, and clamp jaws are sized to specific ranges — a clamp rated for a 1.5-inch seam won't seat correctly on a 2-inch seam. Getting this measurement wrong is the single most common return reason on metal roof racking orders. Expected outcome: a confirmed seam height and matched clamp SKU before the crew shows up.
2. Calculate wind and snow load requirements
Every racking layout has a maximum attachment spacing driven by local wind speed, exposure category, and roof pitch. A 48-inch clamp spacing that works fine in a 90 mph wind zone can fail code in a 120 mph coastal zone without adding attachment points. Run the numbers using published wind load requirements for solar racking before finalizing your layout — this is also what most AHJs want documented in the permit set. Common mistake: using a generic 4-foot spacing rule of thumb without checking it against your specific wind zone.
3. Mark rafter or purlin locations and snap your layout line
On exposed-fastener roofs, every penetrating fastener has to land in structural framing, not just sheet metal — missing the purlin means the fastener pulls out under load. Use a stud finder or the roof's own screw pattern as a guide, then snap a chalk line for the row. On standing seam, this step is simpler since clamps attach to the seam itself, not the framing underneath. Expected outcome: a straight, level reference line for the entire array.
4. Install clamps or L-feet with proper sealing
For standing seam, slide clamps onto the seam and hand-tighten before final torque — don't fully torque one clamp before the rail is dry-fit across the row. For exposed-fastener profiles, every L-foot penetration needs butyl tape under the base and a sealed, gasketed fastener driven into framing, not just sheet metal. Common mistake: relying on sealant alone without butyl tape as the primary water barrier — sealant degrades faster than butyl over a 10-15 year span.
5. Attach and level the mounting rails
Set rails onto the clamps or L-feet and check level across the full row before locking anything down — metal roofs can have slight waviness across large panel runs that throws off a rail line if you don't check every 8 to 10 feet. Shim as needed rather than forcing a rail to bridge an uneven point. Expected outcome: a rail line level within 1/4 inch across the full array width.
6. Torque every clamp and fastener to spec
Under-torqued clamps slip under thermal cycling as the metal roof expands and contracts through seasonal temperature swings; over-torqued clamps can deform the seam or crack the clamp jaw. Most seam clamp manufacturers publish a specific torque value, often in the 90-120 in-lb range — use a calibrated torque wrench, not a cordless driver set to feel. Common mistake: torquing clamps in bright midday heat when the seam metal is already expanded, which changes the effective clamp tension once the roof cools.
7. Bond and ground the entire racking system
Every rail section needs continuous electrical bonding back to a grounding electrode, and standing seam clamps that aren't UL 2703 listed for grounding need a separate bonding jumper. Skipping this step is one of the more common inspection failures on metal roof jobs specifically, because installers assume metal-to-metal contact is enough. Expected outcome: continuous ground path verified with a multimeter before panels go on.
8. Final inspection before panel installation
Walk every clamp and fastener a second time, check torque marks or witness lines, and confirm the layout matches the stamped engineering plan submitted for permit. This is the point where a second set of eyes catches a missed clamp or an under-torqued fastener before it's covered by a 400-watt panel. Expected outcome: a signed-off racking array ready for panel installation and final electrical hookup.
Troubleshooting
- Clamp slips on the seam after a few weeks: Under-torqued at install, or wrong clamp size for the seam height — re-torque to spec or swap to the correct clamp SKU.
- Water intrusion around an exposed-fastener penetration: Butyl tape was skipped or improperly seated — remove the fastener, clean the surface, and reinstall with fresh butyl under the base.
- Rail line isn't level across the array: Roof waviness wasn't checked before rail install — shim individual clamps rather than trying to force the rail straight.
- Grounding continuity test fails: Standing seam clamp isn't UL 2703 listed, or the bonding jumper wasn't installed — add a dedicated bonding jumper between rail sections.
- Permit inspector flags attachment spacing: Layout doesn't match the stamped wind load calculation — resubmit with the correct spacing or add attachment points to meet the engineered spec.
- Seam clamp won't seat fully: Seam height is outside the clamp's rated range — this comes back to step 1, and it's the most common ordering mistake on metal roof jobs.
Tools and resources
- Torque wrench calibrated for clamp-specific in-lb ratings
- Wind load documentation for your zone and roof pitch
- Non-penetrating clamps from S-5!-style hardware lines, or sealed L-feet for exposed-fastener roofs
- IronRidge or Unirac rail systems rated for metal roof attachment spacing
- A source for wholesale solar panels for residential installers if the racking order is part of a full system build
- Grounding lugs and bonding jumpers rated for UL 2703 compliance
What to do next
Once the racking is torqued, grounded, and inspected, the next decision is panel selection and, if the system includes battery backup, sizing that piece correctly. If you're bidding a mixed-roof project — some sections metal, some asphalt or tile — compare the metal roof approach against tile roof mounting systems before finalizing a single hardware order for the whole job, since tile flashing and metal clamps aren't interchangeable.
FAQ
What's the best mounting system for a standing seam metal roof?
Non-penetrating clamps that grip the seam itself, without drilling through the roof panel, are the standard choice for standing seam in 2026. They avoid flashing and sealant maintenance entirely, which is the main reason standing seam is considered the easiest metal profile to mount solar on.
Do you need to drill into a metal roof for solar mounting?
Not on standing seam — clamps attach to the seam without penetrating the panel. Exposed-fastener metal roofs do require drilled, sealed fasteners into structural framing.
How much wind load can solar racking handle on a metal roof?
It depends on your wind zone, exposure category, and attachment spacing — a properly engineered layout in a 90 mph zone and a 140 mph coastal zone will have very different clamp spacing even with identical hardware.
Can you install solar panels on a corrugated metal roof?
Yes, using sealed L-feet fasteners driven into purlins or rafters, with butyl tape as the primary water seal. Corrugated profiles need more careful fastener placement than standing seam since every hole is a potential leak point.
How long does it take to install racking on a metal roof?
A typical residential array (20-30 panels) runs one to two days for racking alone, faster than composition shingle jobs since standing seam skips the flashing step entirely.
What size lag bolts for solar racking on a metal roof?
Exposed-fastener installs commonly use 5/16-inch or 3/8-inch lag screws driven into structural framing, but the exact spec should come from the racking manufacturer's engineering letter for your specific rail system.
Do metal roof clamps void the roof warranty?
Non-penetrating standing seam clamps generally don't affect roof warranties since there's no penetration. Exposed-fastener penetrations can affect warranty terms depending on the roofing manufacturer, so check the roof warranty language before drilling.
Is metal roof mounting more expensive than asphalt shingle mounting?
Hardware costs vary by clamp type and roof profile, but standing seam installs often save labor time since there's no flashing or sealant step, which offsets some of the clamp cost difference.
One last thing
The detail installers miss most in 2026 isn't the clamp spec — it's seam height variance on the same roof. Panels from different production runs, even the same manufacturer, can have seam heights that vary by a fraction of an inch across a single roof, which is why measuring every seam section before ordering hardware beats trusting the roof's stated profile from a spec sheet.
Related guides
