 Inverters & Batteries ship FREE
 Ask about rewards for referring friends and family
 U.S. Based Support
 Want to Add a battery?
solar inverters
How to Install a Rapid Shutdown Device (2026 Guide)
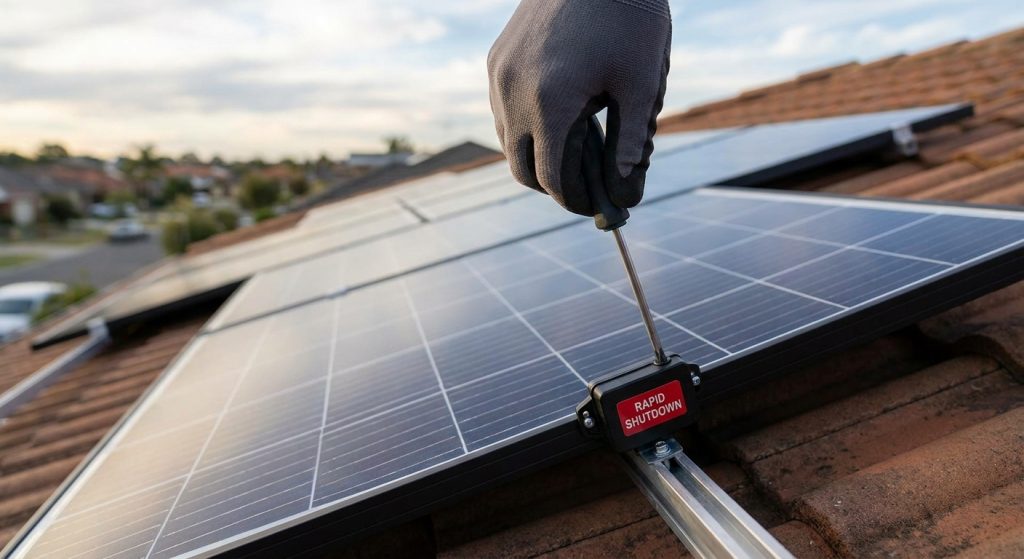
NEC 690.12 requires rapid shutdown on any solar array within 1 foot of a building's roofline, and inspectors in 2026 are failing more installs over rapid shutdown wiring mistakes than any other single code item. This guide walks through mounting, wiring, and commissioning a rapid shutdown device correctly the first time, whether you're a licensed installer running a crew or a residential owner tackling a DIY system.
Why this matters
Rapid shutdown exists so firefighters can de-energize a rooftop array within 30 seconds of hitting the shutdown switch. Get the wiring sequence wrong and the array either won't de-energize fast enough to pass inspection, or it nuisance-trips every time a cloud passes over. Both outcomes mean a callback. Most rapid shutdown failures aren't design failures — they're installation shortcuts: skipped grounding, wrong initiator wiring, or a missed compliant device on one string.
Module-level power electronics solve this cleanest. Microinverters and power optimizers are inherently rapid-shutdown compliant because they de-energize each panel individually at the module, not just at the string. That's why most residential installs in 2026 lean on residential solar microinverters or optimizer-based systems rather than bolt-on rapid shutdown transmitters retrofitted onto a string inverter.
What you'll need
- Rapid shutdown-compliant equipment: microinverters, DC power optimizers, or a dedicated rapid shutdown transmitter/receiver pair rated for your inverter
- Compliant rooftop disconnect switch or initiator, labeled per NEC 690.56(C)
- Torque driver set to manufacturer spec (usually 20-35 in-lbs for MC4-style connectors)
- Multimeter and clamp meter for voltage and continuity checks
- Weatherproof junction boxes and UV-rated conduit
- Grounding lugs and bonding jumpers
- Site one-line diagram and the AHJ-approved permit set
- 2-4 hours per string for a residential system, longer for commercial rooftop arrays
If you're speccing power optimizers instead of microinverters, check power optimizers for partially shaded roofs before you order — shading conditions change which optimizer class makes sense per string.
The steps
1. Confirm your rapid shutdown zone and equipment class
Map out which conductors fall inside the 1-foot rapid shutdown boundary from the roofline — that's everything the code requires to shut down. Most 2026-era residential jobs use module-level shutdown (microinverters or optimizers), which satisfies the requirement automatically at every panel. Confirm your inverter's compatibility list before ordering hardware; mismatched initiator signaling is the single most common return reason installers report.
Common mistake: assuming a string inverter alone meets 2026 code without add-on rapid shutdown hardware. It doesn't — a bare string inverter needs a certified rapid shutdown device layered in.
2. Mount the microinverter or optimizer at each module
Attach the device to the racking rail directly behind its assigned panel, following the manufacturer's bracket spacing. Leave 1-2 inches of clearance for thermal expansion and future service access. A loose or overtightened bracket is the top cause of vibration-related connector failure reported on rooftop arrays after year one.
Expected outcome: every module has its own shutdown-capable device mounted flush to the rail, with cable runs following the shortest safe path to the next device in the string.
3. Wire the DC and communication runs
Connect each module's leads into the microinverter or optimizer, then daisy-chain the AC or communication trunk cable between units per the manufacturer's home-run spec. Keep runs dressed and zip-tied every 18-24 inches so wind loading doesn't chafe insulation against the rail edge.
Common mistake: reversing polarity on trunk cable connectors. Test continuity on every joint before buttoning up conduit — a reversed connection often won't show up until commissioning, costing hours of rework.
4. Install the rooftop disconnect and shutdown initiator
Mount the rapid shutdown initiator switch at the point of interconnection or a readily accessible exterior location, and label it clearly per 690.56(C) signage requirements. This is the switch first responders use, so accessibility and legibility of the label matter as much as the wiring behind it.
Expected outcome: a single accessible switch that, when activated, drops all rooftop conductors to 30 volts or less within 30 seconds.
5. Ground and bond every device
Run continuous equipment grounding conductors through each microinverter or optimizer bracket, terminating at a common grounding bus. Torque every lug to spec — under-torqued grounding lugs are a recurring finding on inspection reports across residential jobs.
Common mistake: daisy-chaining ground wire through racking clips instead of dedicated lugs. Racking bonding jumpers aren't a substitute for a continuous equipment ground back to the disconnect.
6. Test the shutdown sequence before closing anything up
With the array energized, trip the rapid shutdown initiator and clock the voltage drop with your multimeter. Code requires conductors outside the array boundary to drop to 30V within 30 seconds and conductors inside the array boundary to drop to 80V within 30 seconds. Log the actual times — most AHJs want documented commissioning data at final inspection in 2026, not just a verbal confirmation.
Expected outcome: measured, documented voltage drop meeting both thresholds, recorded with timestamps for your permit file.
7. Close up conduit, label everything, and schedule inspection
Seal all junction boxes, dress final conduit runs, and confirm every required label — main disconnect, rapid shutdown switch, and any DC combiner — is legible and UV-rated. If your jurisdiction required a stamped structural review for racking, make sure that documentation is in the permit packet alongside your rapid shutdown commissioning log; see how to get a structural engineer stamp for a solar permit if that step is still open.
Troubleshooting
- Shutdown switch trips but voltage doesn't drop fast enough: Check for a daisy-chain break between microinverters — one bad communication link can delay the whole string's response time.
- Nuisance shutdowns during normal operation: Usually a loose trunk cable connector or a device reading a false fault signal. Re-seat every connector in the affected string and retest.
- Inspector flags missing labels: Reprint labels per the exact language in NEC 690.56(C) — generic warning stickers don't satisfy most AHJs in 2026.
- Multi-string arrays showing inconsistent shutdown timing: Confirm every string routes through the same class of device. Mixing optimizer brands or firmware versions across strings on one combiner is a common cause — see multi-string residential combiner boxes for wiring reference.
- Ground fault reading after rapid shutdown test: Check bonding jumpers at each rail splice — a nicked ground conductor during racking install often only shows up once the system is fully energized and tested.
- Communication signal drops on long roof runs: Add a signal repeater or reroute the trunk cable to shorten the run — most manufacturers cap reliable daisy-chain distance well under a typical commercial roof span.
Tools and resources
- Torque driver calibrated to connector spec, multimeter, clamp meter
- Manufacturer rapid shutdown compatibility matrix for your specific inverter model
- Permit set with rapid shutdown boundary marked on the one-line diagram
- Sizing reference for residential microinverter strings if you're finalizing device count before ordering
- Sun Supply PV stocks microinverters and inverters with free shipping, which matters when you're ordering matched device sets for a full rooftop array rather than piecing hardware together from mixed lots
What to do next
Once rapid shutdown is commissioned and documented, the next code item most installers underestimate is racking wind and snow load calculations — a failed rapid shutdown test is annoying, but a racking failure is dangerous. Review your rail spacing and attachment count against local load requirements before scheduling final inspection.
FAQ
What is a rapid shutdown device on a solar array?
A rapid shutdown device is hardware — typically a microinverter, power optimizer, or dedicated transmitter/receiver — that drops rooftop conductor voltage to safe levels within 30 seconds of a switch activation, satisfying NEC 690.12.
Is rapid shutdown required on every solar installation?
Yes, for any array within 1 foot of a building rooftop under the 2017 NEC and later code cycles most jurisdictions have adopted by 2026. Ground-mount and pole-mount arrays away from structures typically fall outside this requirement.
How much does a rapid shutdown device cost?
Cost varies by device class and manufacturer — module-level microinverters and optimizers roll shutdown compliance into the per-panel device cost rather than adding a separate line item. Contact a distributor for current per-unit pricing on your chosen brand.
Can I retrofit rapid shutdown onto an existing string inverter system?
Yes, with a certified add-on transmitter/receiver kit rated for your inverter model, though full module-level replacement with microinverters or optimizers is often simpler to commission and document.
How long does rapid shutdown installation take?
Budget 2-4 hours per string on a residential job, more for larger commercial rooftop arrays with multiple combiner points.
What's the difference between rapid shutdown at the array boundary versus the module?
Array-boundary shutdown requires conductors outside the array to drop to 30V within 30 seconds; module-level shutdown (microinverters, optimizers) requires conductors inside the array boundary to drop to 80V in the same window — both thresholds apply simultaneously under current code.
Do I need a licensed electrician to install rapid shutdown hardware?
Most jurisdictions require a licensed electrician for the interconnection and disconnect wiring, even on owner-installed systems. Check local permit requirements before starting.
What happens if rapid shutdown fails inspection?
The AHJ will typically require documented voltage-drop testing showing compliance with both 30V and 80V thresholds before signing off — keep your commissioning log from step six on hand for this exact reason.
One last thing
The rapid shutdown test most crews skip is the cold-weather retest. Voltage drop timing on some transmitter-based systems shifts measurably below freezing, and an AHJ doing a winter re-inspection has caught systems that passed a summer commissioning test but ran slow in January. Log your test temperature alongside your voltage-drop numbers — it's a five-second addition to your paperwork that saves a return trip.
Related guides
